


Whether you're organizing Prom, Homecoming, Winter Formal, or another large school event, Omella makes it easy to sell tickets, collect attendee information, and manage check-ins - all in one place.
With Omella, you can:
📆 Set start and end dates for ticket sales
🎓 Validate emails to ensure only eligible students can purchase tickets
🚌 Manage bus and table assignments
👥 Restrict guest ticket purchases with Guest Codes
🔒 Keep payments secure with encrypted, PCI-compliant processing
📧 Automatically send email receipts after every purchase
🎟️ Speed up event entry with QR code check-in
📊 Access real-time reports for easier reconciliation and event management
Choose the setup option that best fits your event.
Some of the most commonly used features include:
⚠️ If your event includes multiple ticket types or pages, contact our team before sharing your page. We'll sync ticket limits and student validation across all options to ensure tickets aren't oversold and students can't purchase more tickets than they're allowed.
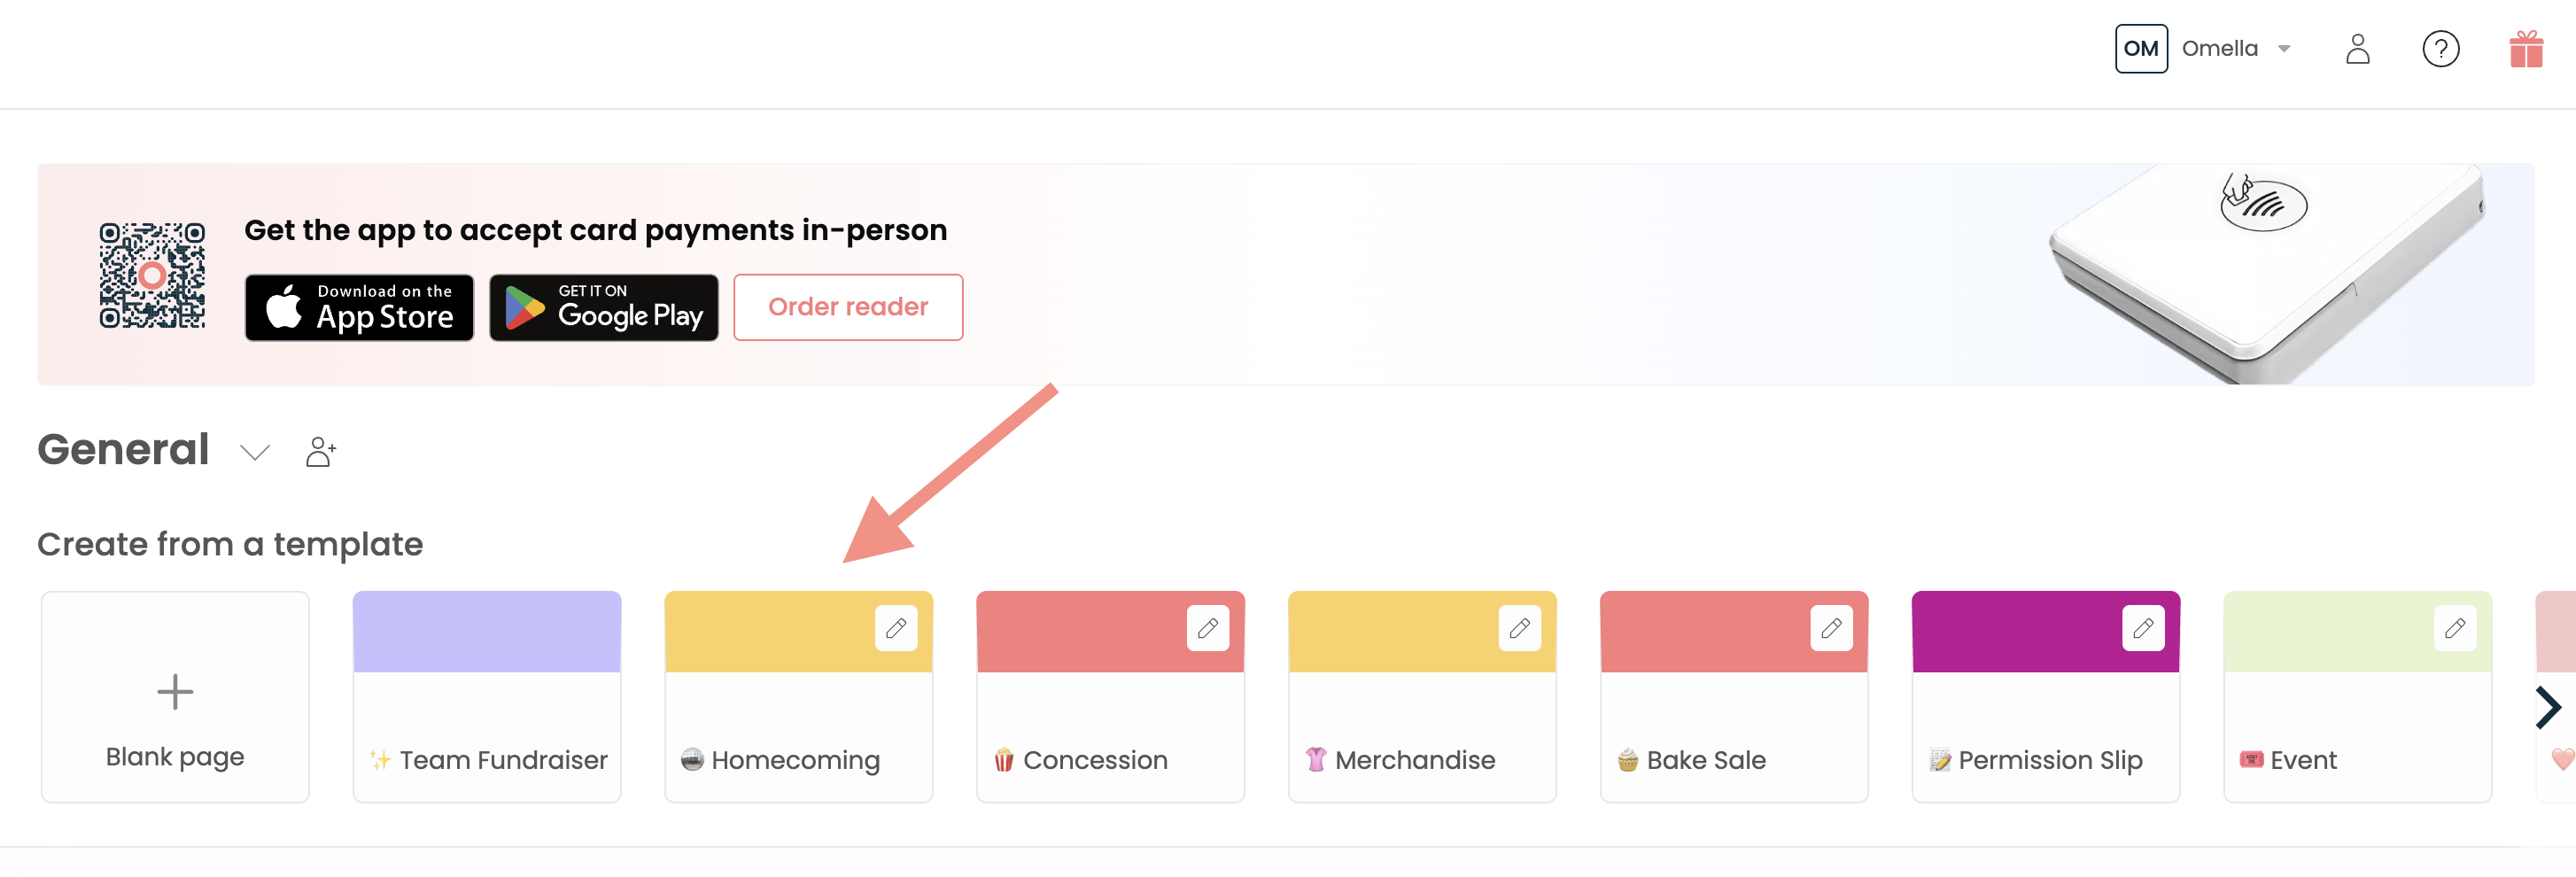
Use our pre-built, fully customizable event template to quickly create your ticket page. Then, use our guide to key editing features and student validation feature to customize and finalize your page.
If your event includes any of the following, please complete our Event Intake form so our team can assist with setup:
We'll make sure your event is configured correctly to:
Before publishing your page, double-check your settings.
📚 Settings
Make it easy for students to purchase tickets.
You can:
📚 Sharing
Track ticket sales as they come in and issue refunds when needed.
You can:
Planning to sell tickets at the door? We can help you set up an in-person payment experience with the Omella Card Reader.
Contact our team to create a simple in-person ticket page and to purchase an Omella Card Reader.
We'll help you:
Help students arrive prepared by sending a reminder email with their ticket QR code.
Please submit your reminder email request at least 3 business days before your event.
Choose the check-in experience that works best for your event.
You can decide whether attendees will:
Once you've chosen your preferred method here, follow our Check-In Guide to complete the setup.
⚠️ Important: Invite your team members or chaperones ahead of time so they're ready to scan attendees on event day.
After or during your event, you can monitor your deposits and reporting.
📊 If you're an Organization Owner or Organization Admin, view organization-level reports to track payment deposits.
Our team is happy to assist! Contact help@omella.com if you have any questions or need assistance setting up your event page!
.png)


The rich text element allows you to create and format headings, paragraphs, blockquotes, images, and video all in one place instead of having to add and format them individually. Just double-click and easily create content.
A rich text element can be used with static or dynamic content. For static content, just drop it into any page and begin editing. For dynamic content, add a rich text field to any collection and then connect a rich text element to that field in the settings panel. Voila!
Headings, paragraphs, blockquotes, figures, images, and figure captions can all be styled after a class is added to the rich text element using the "When inside of" nested selector system.